Esterhazy Tore is probably one of Hungary’s most famous desserts. Named after Prince Paul III Anton Esterházy de Galántha and invented by Hungarian pastry chefs in the 19th century it quickly became famous around the globe. Esterhazy Torte is not the most difficult cake to make but there is a lot going on at the same time so break the process in to steps and don’t rush for a good result.
Esterházy Torte
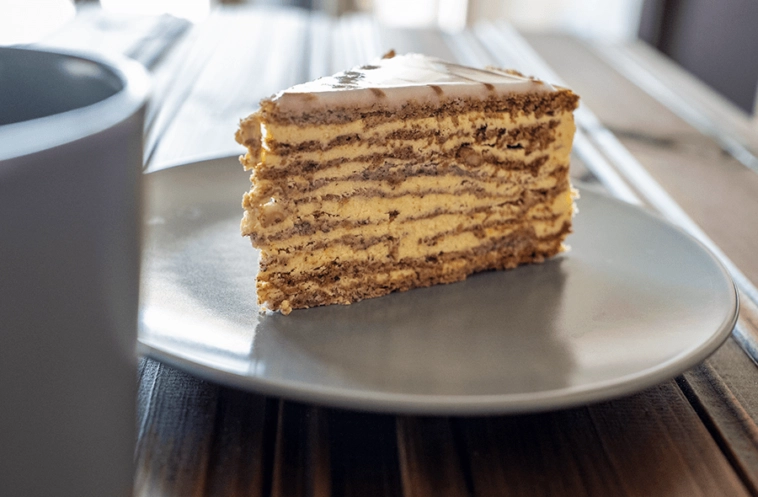
Esterházy Torte is a famous Hungarian cake made out of almond meringue (sometimes walnut or hazelnuts) with alternating layers of custard buttercream and a fondant glaze. This cake is not an easy challenge so make sure you stay organised and follow the steps carefully.
Equipment


Ingredients
Meringue Layers
- 10 Medium Egg Whites
- 275 Grams Ground Walnuts
- 250 Grams Crystal Sugar
Custard Butter Cream
- 10 Medium Eggs Yolks
- 250 Grams Unsalted Butter
- 175 Grams Powder Sugar
- 3 Tbsp All-Purpose Flour
- 230 Ml Milk Boiling
- 1 Tsp Vanilla Extract
Fondant Glaze
- 1 Cup Crystal Sugar
- 3-4 Tbsp Lemon Juice Fresh
- 1 Tbsp Cocoa
Instructions
Step 1 – Meringue Layers
- Meringue is really just whipped egg white, and for this recipe we fold in the nut flour. The trick in getting a perfectly whipped Meringue is using the right equipment and making sure there are no traces of fat or oil in your bowl or beaters. Make sure your egg's are fresh as fresh egg's whip better and have them at room temperature.
- Add your egg whites to your bowl and beat until frothy, add the sugar one table spoon at a time while beating at a high speed. Once all the sugar has been added beat for another 4-5 minutes. The texture of your meringue should be fluffy but strong and creamy.
- With a rubber or silicone spatula slowly and carefully fold the nut flour in to your egg white. Do not use the mixer as this would break the delicate bubbles in the whipped egg and your meringue will end up flat.
- Once well combined take once piece of parchment paper and place an 8 inch spring form on it. Using a dull knife, trace the circle of the spring form on to the parchment paper. Remove the spring form and fill the spread the meringue in to the circle. Don't go too thick as you need to bake 10 layers so each layer should only be slightly thicker than a coin
- OPTIONAL: Instead of baking 10 thin layers you can bake 4-5 thicker layers. For this you can divide the meringue in to 5 equal portions place the bottomless spring form on the parchment paper and evenly spread one portion in to the form. Bake with convection at 140-160C until golden brown. Repeat for each layer.
- Set layers aside to cool and move to step 2
Step 2 – Custard Butter Cream
- In a sauce pan combine the egg yolks and powder sugar and whip until you get a smooth batter. Now add in the flour and whip until smooth and no lumps can be seen.
- Boil the milk and slowly combine in with the egg yolk and sugar while constantly beating. Make sure you add the milk slowly as the egg might curdle if you rush this step.
- Now place the saucepan on a medium flame and constantly stir until it reaches its boiling point. Keep beating the custard vigorously for another 2 minutes until its very thick. It might get clumpy at some point but it will smooth out.
- Let the custard cool, if you want to speed up the cooling process spread the custard on a large plate. In the meantime whip the butter in your mixer until it is very smooth and has a white pale colour.
- At a medium high speed, beat the custard in to the butter until you have a smooth butter cream. I like to place it in the fridge for a few minutes as it makes it easier to work with but this is up to you.
Step 3 – Assembly
- To make assembly easier and avoid the cake moving while you apply the cream, dab a little of the buttercream on the plate and stick one of the meringue layers on your cake plate.
- Add two table spoons of buttercream between every layer. If you opted for 5 thicker layers than double the amount. A small tip: when i first make a recipe I divide the filling first to avoid running out of buttercream for the outside of the cake. Do NOT but batter on the final top layer as it will hold the Fondant Glazing.
- Now cover the sides of the cake with a thin layer of buttercream, just enough to give it a nice round shape and hold the nuts for decoration.
- You can now decorate the sides with either nut flour or sliced almonds. Do this by filling your hand with the ground nut flour and holding the cake at a light angle. Press the nut flour on the side until all sides are covered. If you use almond slices stick them on at a pattern one at a time.
Step 4 – Fondant Glazing
- For the fondant glazing, put the powder sugar in a small bowl, add one table spoon of lemon a time and stir until you get a thick paste like texture. Be careful with the lemon juice as too much will make the glancing run of the cakes sides.
- Set a 3-4 spoons of glazing aside and pour the rest on the middle of the cake and let it spread evenly. You can help it spread with a knife or the backside of a spoon but be careful not to get any cake crumbs in to the glazing.
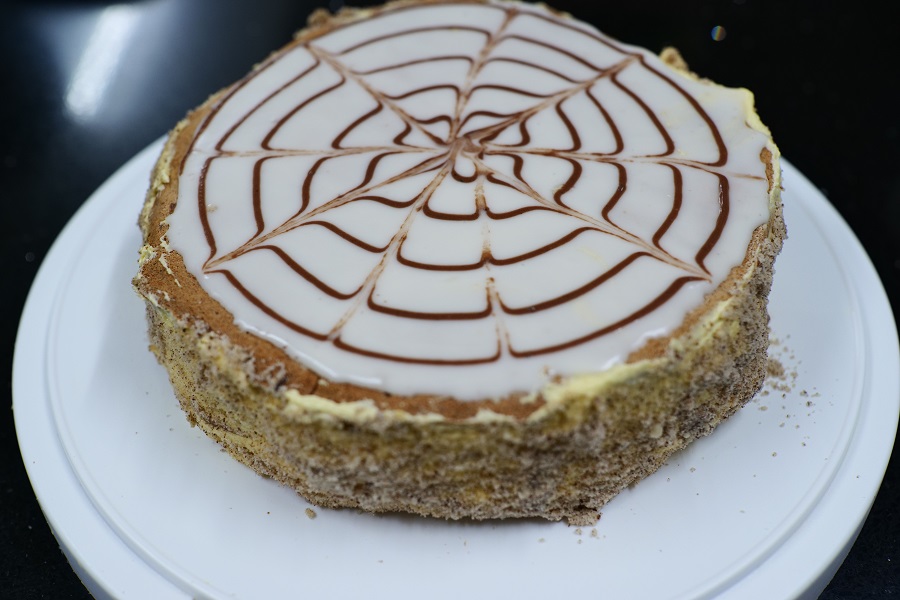
- Add 1-2 teaspoons of cocoa to the remaining fondant glazing, mix until smooth. Place in to a pastry bag with a small hole attachment and squeeze a thin line in a spiral shape starting from the centre of the cake to the edge.With the tip of a chopstick draw alternating lines from the centre to the edge and vice versa this will give you the famous Esterhazy pattern.
Notes
-
Let the cake cool overnight, I know this is a difficult step but trust me it tastes ten times better the next day. The sponge absorbs the buttercream flavour and the buttercream hardens for a perfect cut.
Nutrition
Serving: 100g | Calories: 651kcal | Carbohydrates: 88g | Protein: 14g | Fat: 30g | Saturated Fat: 5g | Polyunsaturated Fat: 17g | Monounsaturated Fat: 6g | Cholesterol: 247mg | Sodium: 87mg | Potassium: 296mg | Fiber: 3g | Sugar: 81g | Vitamin A: 378IU | Vitamin C: 3mg | Calcium: 100mg | Iron: 2mg